Category: Moving Tips

  • Dorm Move-In Day Tips: How to Make College Move-In Smooth and (Almost) Stress-Free

    Dorm Move-In Day Tips: How to Make College Move-In Smooth and (Almost) Stress-Free

    Dorm move-in day is exciting, chaotic, and emotional all at once. Crowded parking lots, strict time windows, heavy boxes, and nervous goodbyes can make the day feel overwhelming for both students and parents. With smart planning and a clear strategy, you can turn move-in day into a manageable, even enjoyable start to college life.

    Before Move-In Day: Plan Ahead

    Colleges usually send detailed move-in instructions weeks in advance, but many families skim them and run into surprises like limited elevators, assigned time slots, or banned items. Take time to read those emails and housing portal pages, noting your exact check-in time, where to park, which door to use, and whether there are helpers like orientation leaders on hand.

    Roommates who coordinate early avoid duplicate mini-fridges and three microwaves in a tiny space. A quick video call to divide shared items (fridge, rug, TV, curtains) and talk about basic layout saves money and space. If your student is flying in or doesn’t have family nearby, consider scheduling dorm movers to handle heavier items and multiple trips from the car.

    Pack Smart and Prepare an Essentials Bag

    Tips for dorm room move in a day

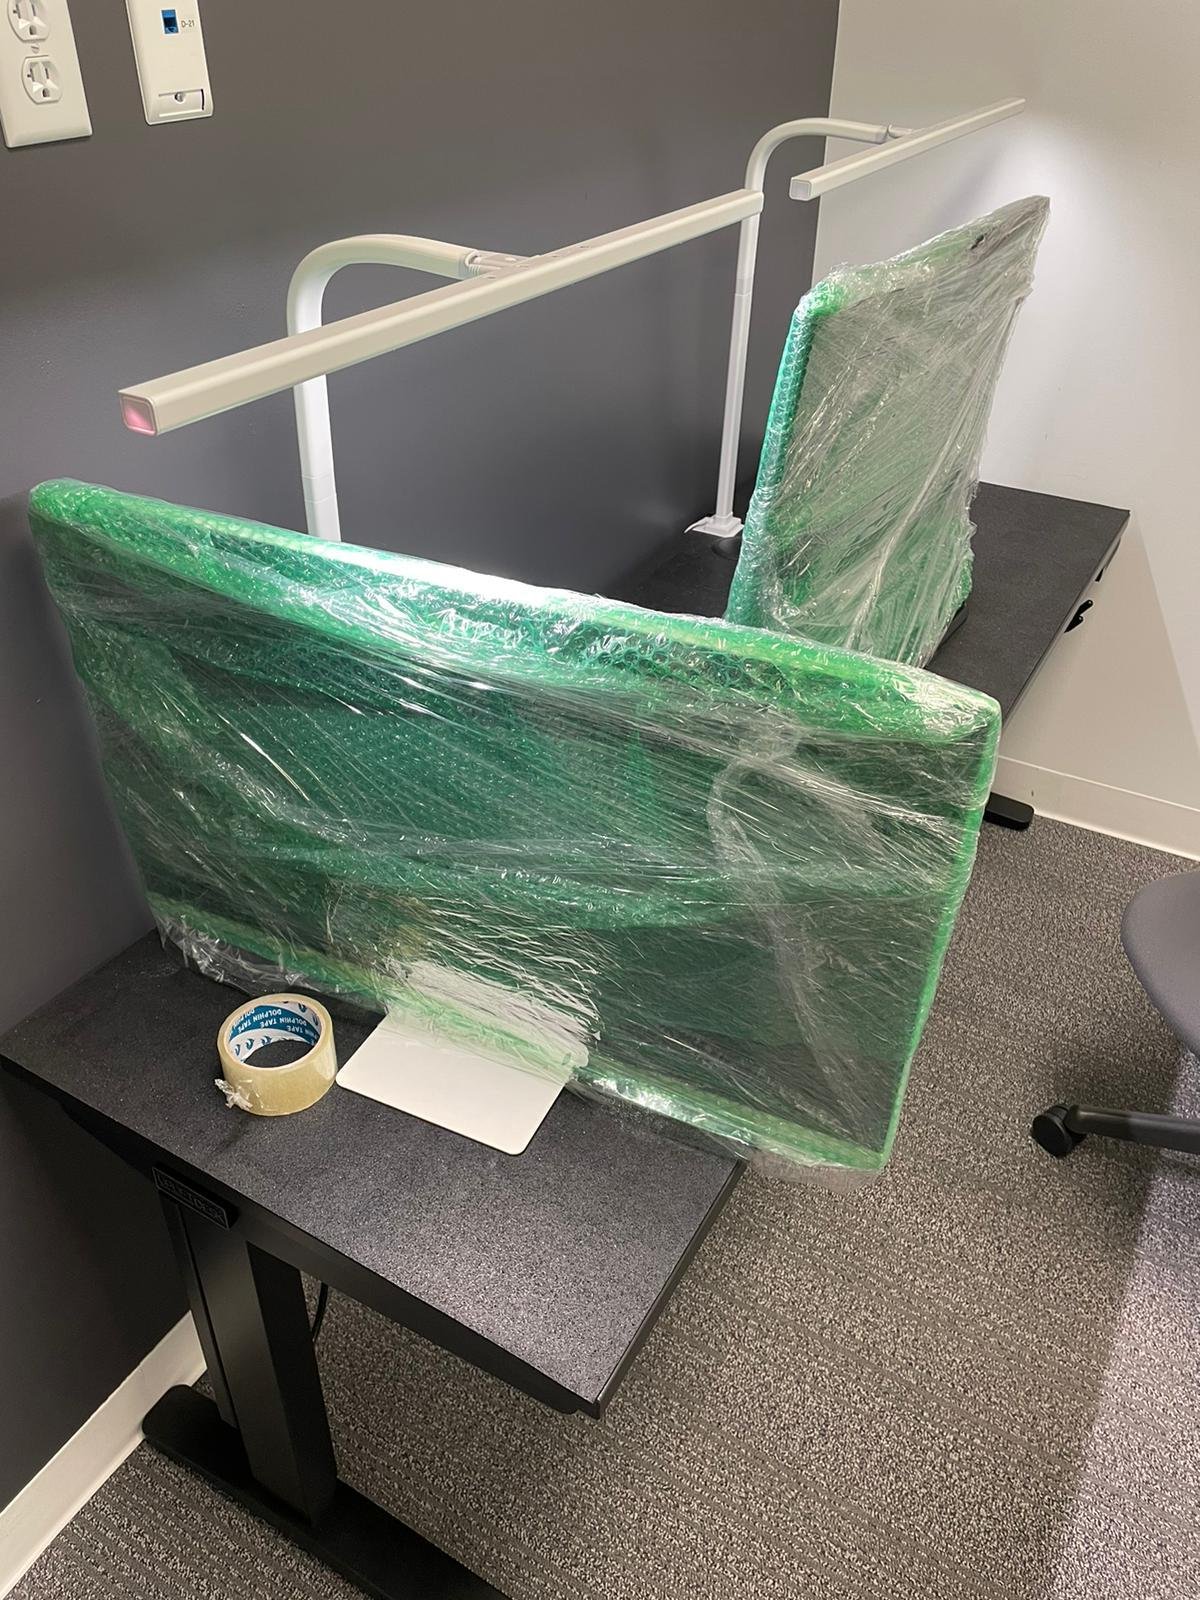
    Bringing “everything from home” is one of the most common mistakes on move-in day, and it quickly turns a small room into a cluttered storage unit. Experts suggest focusing on high-usage essentials first—bedding, everyday clothing, toiletries, basic school supplies, and simple décor—and leaving seasonal or rarely used items for a later visit or shipment.

    Pack a separate “move-in day” or essentials bag that never leaves your side. This should include ID, housing documents, medications, phone and laptop chargers, basic toiletries, a change of clothes, and simple tools like scissors and tape. For example, one parent-focused guide recommends treating this like an overnight bag so the student can function even if boxes aren’t fully unpacked that day.

    Choose the Right Arrival Time and Dress for the Job

    Many colleges assign arrival windows, but families often can choose morning or afternoon within those blocks. Morning arrivals typically mean cooler temperatures, easier parking, and shorter elevator lines, while late afternoon may be calmer after the initial rush but hotter and more tiring. Pick a time that matches your student’s energy level and your travel constraints.

    Move-in day is not the moment for fashion shoes or complicated outfits. Comfortable clothes and closed-toe sneakers are strongly recommended because you will be lifting, bending, and possibly waiting in outdoor lines. Many parent guides specifically mention sun protection—hat, sunscreen, and water—because August move-ins can be brutally hot in many regions.

    Check-In, Parking, and Unloading Like a Pro

    When you arrive on campus, follow the posted signs and staff directions to the check-in area, where your student will typically receive a room key, access card, and possibly a parking or unloading permit. Having IDs and confirmation emails ready speeds things up and keeps the line moving.

    Most campuses use a “load, then move the car” system: you pull into a temporary loading zone, unload everything quickly to the curb or sidewalk, then one person moves the car to long-term parking while others start hauling items inside. Some schools lend carts or have student volunteers, but they often run out during peak times, which is why many families bring a foldable wagon or small dolly from home.

    First Steps Inside the Room: Clean, Inspect, and Make the Bed

    It is tempting to start tearing open boxes everywhere, but a quick clean and inspection will save headaches later. Many move-in checklists recommend wiping down desks, dressers, and shelves, and doing a fast sweep or vacuum before bringing in everything else. Take photos of any pre-existing damage (scratched furniture, marks on walls, broken blinds) and submit them through the school’s maintenance or housing portal so you are not blamed at move-out.

    Making the bed early is a small but powerful move. Guides note that once a mattress topper, sheets, and comforter are on, the room instantly feels more livable and the student has a place to rest if the day becomes overwhelming. In practice, many families unpack in this order: bed, bathroom/ toiletries, everyday clothes, then desk and décor.

    Layout and Storage: Designing a Functional Tiny Space

    Dorm rooms are small, so the way you arrange furniture on move-in day has a big impact on how livable it feels. Many colleges provide standard twin XL beds, a desk, chair, and a dresser, and some allow lofting or raising beds to create storage underneath. Students often push beds against walls or into L-shapes with a roommate to open up a central floor area.

    Vertical space is your friend: over-the-door organizers, hanging shelves, and stackable bins help keep necessities accessible without cluttering the limited floor. For example, some checklists suggest using under-bed bins for off-season clothes and bulkier items, leaving the closet for daily wear and shoes.

    Organization Hacks That Make Week One Easier

    Unpacking by “zone” instead of by box helps keep things under control. Many experts suggest setting up one area at a time—sleep, study, closet, bathroom—rather than opening every container and spreading items all over the room. This way, even if you run out of time, the most important zones are functional.

    Labeling containers with both category and frequency of use (for example, “Desk – daily,” “Extras – rarely”) can help the student remember where things are after family leaves. A small caddy for shower supplies and a hook for a towel near the door are frequently recommended so that the first late-night shower is easy, not a scavenger hunt.

    Social and Emotional Tips for Students

    Move-in day is not just about boxes; it is the beginning of a new social chapter. Student-oriented advice emphasizes keeping dorm doors open while unpacking (if allowed) as a natural way to meet neighbors and say quick hellos. Attending the first evening’s hall meeting or welcome event, even if the room is not perfect yet, is repeatedly recommended to ease the transition.

    Students are also reminded that the room does not have to look like a finished Pinterest board on day one. Many resources stress that decorating and fine-tuning can happen gradually over the first weeks, relieving pressure to achieve an “Instagram-perfect” space before parents leave.

    Guidance for Parents: Help, but Don’t Hover

    Parent-focused articles consistently highlight the balance between being helpful and letting the student take ownership. Parents can be invaluable for hauling items, assembling small furniture, and doing initial cleaning, but they are encouraged to let the student make decisions about layout, décor, and where things go.

    Goodbyes are another emotional flashpoint. Several parent resources recommend agreeing in advance on a rough departure time so the day does not drag into an awkward, tearful marathon. A short, supportive goodbye—followed by a planned text or call later that evening—tends to work better than repeated attempts to “fix” every small issue before leaving.

    Common Move-In Day Mistakes to Avoid

    Move-in guides often list “don’ts” that can save families from frustration. Overpacking tops the list, especially bringing furniture or décor that simply does not fit the small footprint. Another frequent issue is packing too many items in huge, unstructured bags or boxes that are hard to carry up stairs or through crowded hallways.

    Other pitfalls include forgetting basic tools and cleaning supplies, ignoring housing rules about prohibited items, and failing to label boxes with the student’s name, building, and room number. Parents’ groups also warn against parents taking over move-in, speaking for their student, or staying long after most other families have gone.

    How Dorm Move-In Day Movers Can Help

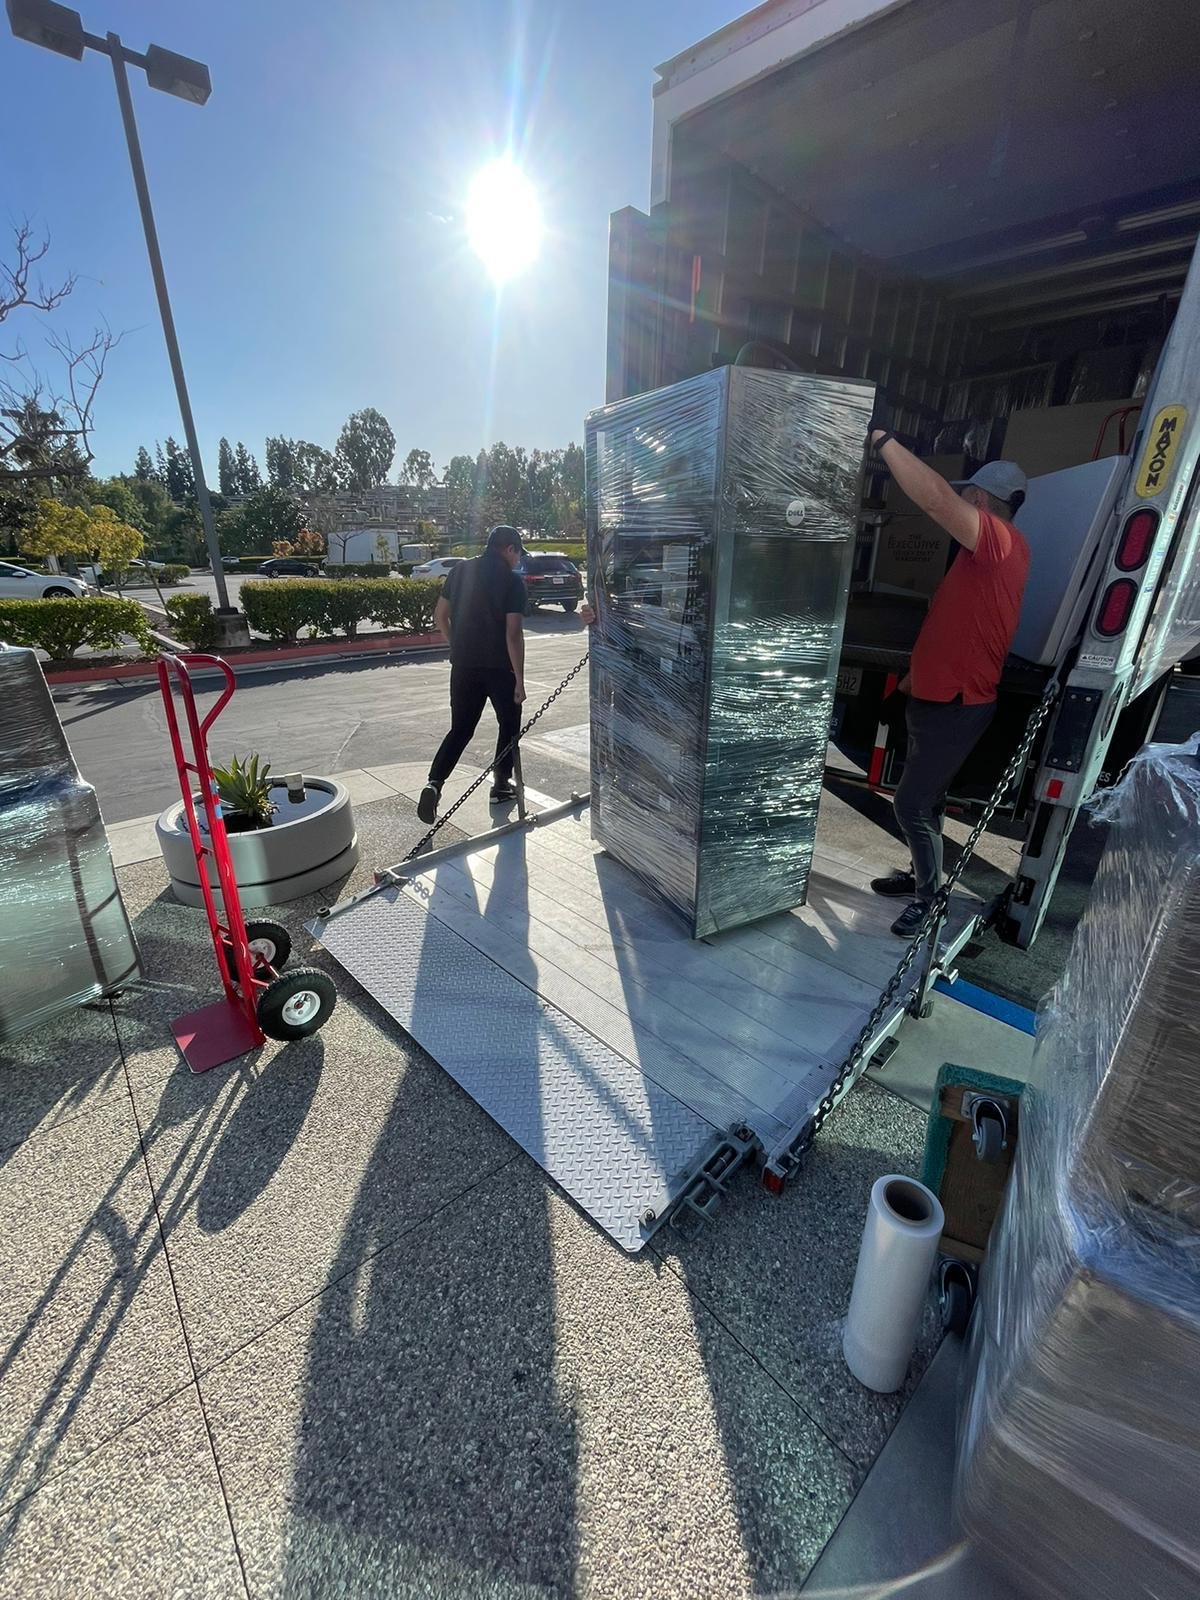
    For students moving long distances, those without family available, or those with a lot of belongings, professional dorm movers can make move-in day significantly easier. Local movers familiar with campus environments know how to work within narrow time windows, crowded loading zones, and limited elevator access. They can handle heavy or awkward items—like mini-fridges, TVs, or bulk boxes—in fewer trips and with less strain on students.

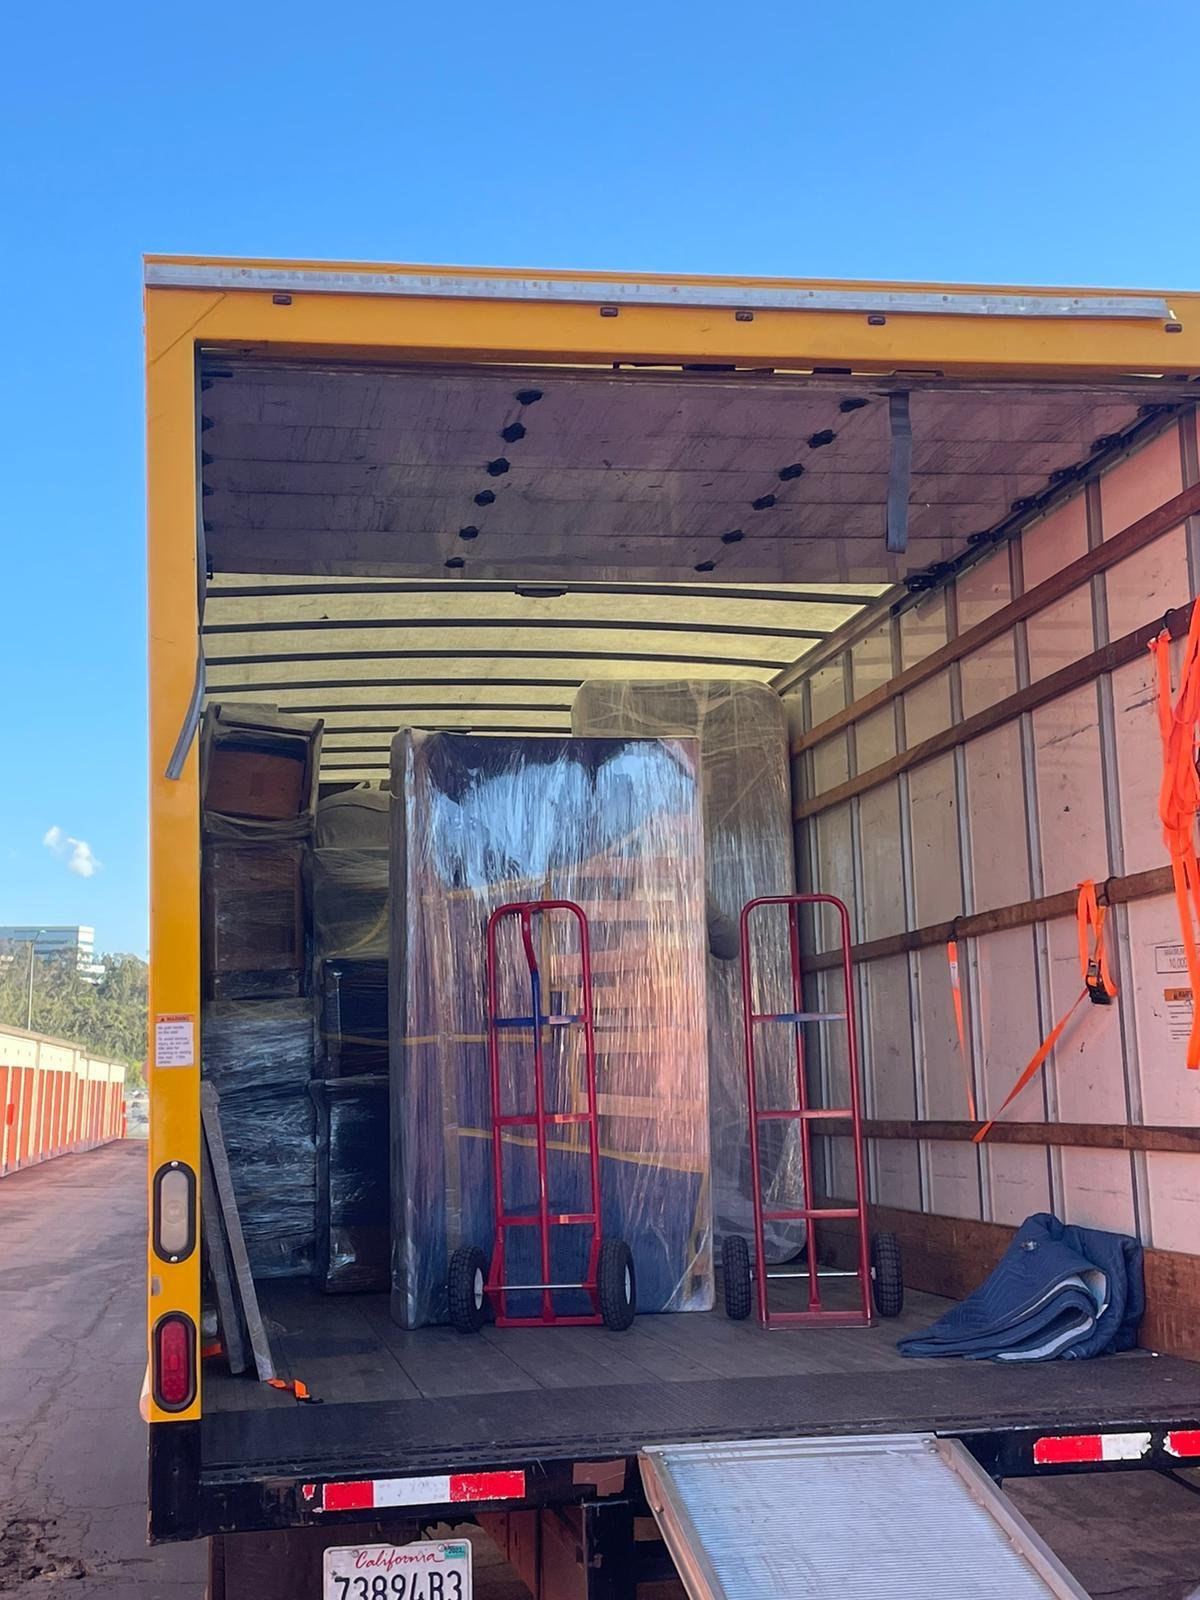
    Dorm movers also offer related services, like picking up items from local storage, delivering them directly to the dorm, or returning them to storage at move-out. For example, a student who stored boxes near campus over the summer could schedule movers to bring everything to the dorm during the assigned check-in window instead of renting a car and making multiple runs.

    Dorm move-in day will always be busy and a little emotional, but it does not have to be chaotic. By understanding your college’s process, packing thoughtfully, arriving prepared, and focusing on key setup tasks, you can turn the day into a smooth launch rather than a stressful scramble. Students who take ownership, connect with neighbors, and accept that “good enough” is fine for day one usually settle in more quickly. Parents who help with the heavy lifting and then step back give their students the best chance to thrive in their new home away from home.

  • Checklist for Dorm Move-In and Move-Out: Your Essential Guide for a Smooth Transition

    Checklist for Dorm Move-In and Move-Out: Your Essential Guide for a Smooth Transition

    Moving into or out of a dorm can be a stressful experience, especially for college students who are often juggling academic and social commitments. Having a detailed checklist for dorm room move-in and move-out helps students stay organized, avoid last-minute chaos, and ensures nothing important is forgotten. This guide covers everything from pre-move planning to final move-out steps, making your dorm transition seamless.

    Checklist for dorm move in and out

    Pre-Move Planning

    Before the big day arrives, preparation is key. Confirm your dorm move-in and move-out dates and familiarize yourself with your dormitory’s policies regarding moving times, elevator use, and parking. Often, schools allocate specific times or days for moves which can get booked quickly, so reserve your preferred slot early.

    Coordinate logistics with your roommates and family members, especially if you are sharing responsibilities or transporting belongings together. If you plan to hire dorm room movers or professional movers, book them in advance to avoid availability issues.

    Dorm Move-In Checklist

    Packing Essentials

    Start packing early and group your items logically. Include:

    • Bedding: sheets, pillows, blankets tailored to your dorm bed size
    • Toiletries: toothbrush, soap, shampoo, towels
    • Clothing: appropriate for the season and campus activities
    • School supplies: notebooks, stationery, laptop, chargers, printer if needed
    • Storage organizers: bins, hooks, closet organizers to maximize limited space
    • Small kitchen items: reusable water bottles, snacks allowed in dorms

    Preparing for Moving Day

    Measure your dorm room and entryways to make sure your furniture and large items will fit. Clearly label all your boxes, bags, and suitcases with your name and dorm room number to simplify identification.

    Pack a “first-day kit” with essentials like snacks, toiletries, a change of clothes, phone charger, and medications so you have easy access without needing to unpack everything immediately.

    Confirm the moving time with your movers or helpers and review parking instructions with the dorm staff to avoid surprises.

    On Arrival

    Upon entering the dorm, inspect your room for existing damages or issues and report these immediately to avoid responsibility later. Unload your “first-day kit” and set up key areas such as your bed and study desk for immediate comfort.

    Take time to meet your roommates and familiarize yourself with dormitory amenities like laundry, mailroom, and common areas. Keep important documents such as your student ID, housing contract, and emergency contacts handy.

    Dorm Move-Out Checklist

    Packing and Cleaning

    Begin sorting your belongings into items to keep, donate, or discard. Make sure to remove all personal items and clean your space thoroughly — sweep floors, wipe surfaces, and remove all trash.

    Properly dispose of garbage and recycle or donate unwanted items in accordance with dorm policies. If you’ve disassembled any furniture or modular beds during move-in, reassemble them or ensure they are properly packed for transport.

    Final Checks and Move-Out Day

    Take photos of your empty dorm room as proof of its condition upon departure. Return keys, access cards, and any issued dorm property as required to avoid fines.

    Fill out any exit inspection forms and communicate with dorm management about final arrangements.

    On moving day, coordinate mover arrivals according to dorm move-out time slots. Handle fragile or valuable items like electronics with care and keep boxes clearly labeled by content and destination.

    Tips to Make Dorm Moves Easier

    Efficient packing saves time and space. Use vacuum storage bags for bulky bedding and clothing, and organize small essentials in clear bins.

    Communicate well with movers and dorm staff. Clarify expectations and confirm schedules to prevent delays.

    Keep electronics, chargers, and valuables packed separately in easily accessible bags for security.

    Practice stress management techniques around move time—deep breathing, scheduling breaks, and seeking help as needed.

    Why Hire Professional Dorm Room Movers?

    Hiring professional movers in your area specializing in dorm moves offers significant advantages: faster move times, expert handling of tight spaces and fragile items, and reduced physical strain on students and families.

    Common services include packing assistance, loading and unloading furniture, disassembly and reassembly, and transportation.

    Dorm room movers in Los Angeles understand campus-specific challenges and coordinate with dorm staff for smooth access.

    A well-structured checklist is an indispensable tool for dorm move-in and move-out, helping students navigate the process thoughtfully and effectively. Early preparation, organized packing, clear communication, and knowing when to seek professional help can transform what might be a stressful event into an exciting new chapter. Plan ahead and make sure your dorm move is as hassle-free as possible.

  • How to Move Gym Equipment: Comprehensive Guide for Safe and Efficient Relocation

    How to Move Gym Equipment: Comprehensive Guide for Safe and Efficient Relocation

    Moving gym equipment poses unique challenges due to its substantial weight, bulk, and the delicate nature of certain components. Whether relocating a home gym setup or transferring commercial fitness machines, safety and thorough planning are paramount to avoid injuries and costly equipment damage. This comprehensive guide will walk you through everything you need to know—from initial measurements, disassembly, packing, and lifting techniques to transport and reassembly—helping you decide when to hire professional movers versus taking the do-it-yourself route.

    Gym equipment moving

    Planning and Preparation

    Before lifting a single weight or disassembling a machine, start with meticulous planning:

    • Measure each piece of equipment’s dimensions as well as your home or facility’s doorway, hallway, stairwell, and elevator dimensions along the moving route. This critical step helps avoid surprises when maneuvering large machines like treadmills or multi-station gyms.
    • Develop a layout plan for your new space. Understanding where each piece will go upon arrival streamlines the unpacking and setup process.
    • Take photos of your current gym layout and complex equipment assemblies to guide reassembly later.
    • Review the manufacturer’s manuals or online resources, which often have model-specific instructions for disassembly and moving.

    Disassembly and Weight Removal

    Reducing weight and separating components significantly simplifies the moving process. Most gym equipment comprises modular parts:

    • Remove weight plates, dumbbells, and selectorized stacks to lighten machines and prevent damage during transit. For instance, a loaded squat rack can weigh hundreds of pounds more than the frame alone.
    • Detach smaller components such as adjustable benches, pull-up bars, safety spotters, and cable attachments.
    • Carefully label and pack small parts, bolts, and screws into labeled plastic bags.
    • Photograph assembly connections to help with smooth, error-free reassembly.

    Gathering Proper Tools and Materials

    Equipping yourself properly is essential for efficiency and safety:

    • Heavy-duty moving blankets, bubble wrap, and towels protect delicate components like LED displays, upholstery, and pedals.
    • Furniture dollies and hand trucks rated for weights over 150 lbs are necessary for bulky machines such as ellipticals and stair climbers.
    • Lifting straps or harnesses help distribute the weight evenly and assist in controlling awkward loads such as multi-gyms or rowing machines.
    • Packing tape, permanent markers for labeling, and a basic set of tools facilitate disassembly and securing delicate parts.

    Preparing Gym Equipment for Moving

    Thorough preparation prevents avoidable damage:

    • Power down and unplug all electronic devices. Secure cords by wrapping and taping them cleanly to machines in labeled bundles.
    • Wrap consoles, pedals, hydraulic pistons, cables, and any exposed mechanical parts with protective padding.
    • Use Velcro straps, bungee cords, or locking mechanisms to secure folding decks and adjustable parts.
    • Clean equipment surfaces to remove sweat, oils, or dust that may cause slipping hazards during handling.

    Safe Lifting and Moving Techniques

    Heavy lifting is the most hazardous aspect of moving gym equipment; avoiding injury here is crucial:

    • Always lift using your legs, not your back, keeping the load close to your torso.
    • Communicate clearly with any helpers—agree on commands, pace, and rest points before starting.
    • Dollies and lifting straps help control and stabilize equipment on flat surfaces and stairs.
    • Do not move machines exceeding 50-70 lbs alone—enlist multiple strong helpers or professionals.
    • Take frequent breaks to avoid fatigue, which increases injury risk.

    Protecting Floors, Walls, and Pathways

    Preventing damage to your home interiors is just as important as protecting your equipment:

    • Place furniture sliders or mats under the feet of heavy machines to avoid dents and scratches on hardwood or tile.
    • Roll equipment over low-pile carpets rather than dragging.
    • Temporarily relocate rugs, clear pathways of obstacles, and protect door jambs with padding when negotiating tight spaces.

    Secure Loading and Transport

    Properly securing equipment during transit is critical to avoid damage and accidents:

    • Place equipment upright and load in a way that balances the vehicle load weight.
    • Use ratchet straps or bungee cords to secure machines to tie-down points.
    • Avoid stacking heavy items on top of lighter or fragile equipment.
    • Cushioned barriers between pieces reduce impact damage during sudden stops or sharp turns.
    • Drive carefully and check straps during long-distance moves.

    Unloading and Reassembly

    When you arrive at your new location:

    • Carefully unload equipment using dollies and helpers to reduce strain.
    • Place equipment in assigned locations first based on your pre-move layout.
    • Follow reassembly photos, labels, and manuals carefully.
    • Test electronic and mechanical parts, starting with low resistance or speed settings to ensure proper functionality.
    • Tighten all bolts and screws fully after reassembly.

    Professional Movers vs. DIY: Making the Right Choice

    Deciding whether to hire movers in your location or do it yourself involves weighing safety, cost, and convenience:

    • Professional movers bring experience, tools, and manpower, ensuring efficient and damage-free moves. They typically charge between $500-$2,000 depending on gym size and move complexity.
    • DIY moving, while cheaper (often $100-$300 for truck rental and supplies), demands thorough planning, physical capability, and multiple helpers. It carries higher injury and equipment damage risk.
    • Large commercial gyms or heavy home gyms (treadmills, multi-gyms weighing 300+ lbs) often benefit from professional handling.
    • Smaller, modular equipment like weight benches or dumbbells are more manageable for DIY movers.

    Common Mistakes and Safety Tips

    Avoid these pitfalls for a safer move:

    • Rushing the move or underestimating equipment weight.
    • Attempting to lift heavy equipment alone.
    • Forgetting to remove weights or unsecured parts.
    • Ignoring manufacturer-specific instructions.
    • Neglecting to protect floors and walls.
    • Failing to confirm equipment condition before and after moving.

    Moving need not be daunting when done with preparation, the right tools, and safe handling practices. Prioritize planning, disassembly, labeling, and protection to ensure your valuable machines are moved without injury or damage. Whether hiring professional movers for gym equipment or moving yourself, this structured approach will help you transition your fitness space seamlessly and safely.

  • Best Way to Move a Treadmill: Expert Guide with DIY and Professional Options

    Best Way to Move a Treadmill: Expert Guide with DIY and Professional Options

    Moving a treadmill safely and efficiently requires careful planning, preparation, and the right techniques to prevent injuries and equipment damage. Treadmills are heavy, bulky, and consist of sensitive components like motors and consoles that need special care. The best way to move a treadmill starts with thoroughly reviewing the manufacturer’s instructions and measuring the treadmill and all doorways, hallways, and staircases it will pass through to ensure clearance. Essential moving supplies such as moving blankets, a furniture dolly, heavy-duty straps, and packing tape should be gathered to protect the equipment and ease transportation. This comprehensive guide covers every essential step for moving your treadmill effectively, whether you choose to do it yourself or hire professionals.

    Treadmill moving and packing

    Preparation Before Moving

    Before lifting the treadmill, consult your treadmill’s manual for manufacturer-specific instructions. Measure the equipment as well as doorways, hallways, and staircases along the route to ensure clearance. Collect necessary materials like moving blankets, a furniture dolly, heavy-duty straps, packing tape, and strong helpers.

    Power Down and Secure Equipment

    Unplug the treadmill and allow it to cool if you have recently used it. Securely wrap and tape loose cords and remove detachable parts, labeling and packing them separately for easy reassembly. Proper cord management prevents tripping hazards and gear damage during transport.

    Protect and Prepare the Treadmill

    Protect vulnerable areas such as the console, handles, and edges by padding with moving blankets or towels. Use straps or Velcro bands to secure folding decks and movable parts, preventing shifting or collapse in transit.

    Map Out and Clear the Moving Path

    Clear obstacles and rugs in advance, and protect floors to avoid damage. For staircases or porches, use ramps or additional helpers for safe maneuvering.

    Lifting, Rolling, and Moving Techniques

    Always lift with your legs, not your back, and ensure you have at least one trusted helper for assistance. Use the treadmill’s built-in wheels if available by tilting it back gently, or employ a furniture dolly to roll it. Move slowly and communicate clearly to avoid accidents.

    Loading and Transporting

    When loading into a vehicle, place the treadmill upright to maintain weight distribution. Secure it tightly with straps to prevent tipping or movement during transit, which can damage the motor or frame.

    Unloading and Reassembly

    Unload carefully, placing the treadmill in its new position. Reassemble removable components first using your labeled bags or photos. Test the treadmill at a low speed to verify all functions operate correctly after the move.

    Professional Movers vs. DIY: Which is Best?

    • Costs: DIY moving a treadmill may cost between $100-$200 plus truck rental and supplies, while hiring professional movers can range significantly higher depending on your location and the equipment’s size (average moving costs for other large items usually require a crew of 2-4 and last 3-6 hours). Though DIY may initially sound cheaper, hidden costs and risks can add up.​
    • Safety: Professional movers bring experience and proper tools, greatly reducing injury risks from heavy lifting or improper technique. DIY moves should only be attempted if you have multiple physically capable helpers and the right equipment.
    • Convenience and Efficiency: Professionals handle disassembly, transport, and reassembly quickly, saving time and effort. DIY gives control to the owner but demands intensive planning and labor.
    • When to Hire Pros: For commercial-grade or heavy treadmills, complicated building access, stairs, or long-distance moves, professional movers are highly recommended.
    • DIY Tips: If you decide to move the treadmill yourself, ensure all equipment is secured for transport, recruit at least two strong helpers, and plan your route thoroughly.

    Moving a gym equipment successfully requires preparation, care, and safety. Whether you opt for professional movers or DIY, following these steps will help you avoid injury and equipment damage, ensuring your treadmill stays in excellent condition at your new location.

  • How to Prepare for a Same-Day Move in Los Angeles: What to Do When Time Is Short

    How to Prepare for a Same-Day Move in Los Angeles: What to Do When Time Is Short

    Same-day moves in Los Angeles are intense—tight schedules, city traffic, unexpected paperwork, and last-minute packing can quickly overwhelm even the most organized person. With the right plan, however, you can tackle a rapid relocation with confidence and minimal stress.

    How to Prepare for a Same-Day Move in Los Angeles

    Step 1: Plan Every Detail in Advance

    Start by booking your same-day movers as soon as you know your timeline. The best companies in LA have streamlined, responsive crews ready for urgent jobs. Contact your utility providers (electricity, water, internet) to transfer or set up service in your new home—having working utilities is vital for moving in. If possible, arrange a slight overlap of leases, even by a few hours, to give yourself buffer time for packing or cleaning.

    Step 2: Declutter and Purge

    Quickly sort through belongings and let go of anything you don’t need. Donate clothing, recycle old electronics, and toss expired pantry items. The lighter your load, the faster the move—and your movers will thank you. Focus on big, bulky or rarely-used items first for the biggest savings.

    Step 3: Pack Smart and Fast

    Label every box by room and priority; create an “open first” essentials box with daily must-haves (clothes, chargers, toiletries, snacks). Pack directly in suitcases, storage bins, laundry baskets, or existing containers to save time on assembling boxes. Wrap valuables and fragile items securely—the rush of same-day moving means careful packing matters.

    Step 4: Game-Day Moving Logistics

    Reserve parking space (or a loading zone) and elevator access if you’re in an apartment or managed building—LA regulations can cause delays or fines without notice. Let building management know when movers are coming, and clarify rules for moving in or out. Starting early helps dodge traffic congestion and maximize daylight hours in Los Angeles.

    Step 5: Coordinate with Movers and Helpers

    Clear, early communication is critical on a same-day move. Tell your movers about difficult furniture, fragile items, or deadlines. Assign packing or errands to family or friends, or hire professional packing help for priority items. Confirm arrival times, access procedures, and what items need special care.

    Step 6: Stay Flexible and Calm

    Even the best plans can hit LA traffic snafus, building delays, or logistical hiccups. Stay calm, adaptable, and ready to adjust your strategy, whether it’s waiting for a parking spot or rescheduling a step in your move. The best LA moving crews are used to handling last-minute surprises and will help troubleshoot issues.

    A short-notice move in Los Angeles isn’t easy, but organized, step-by-step preparation makes it possible. Book movers quickly, declutter, pack with care, secure building logistics, and master communication for a same-day success.

  • Cheapest Way to Move Short Distance in Los Angeles: Insider Tips

    Cheapest Way to Move Short Distance in Los Angeles: Insider Tips

    Moving within Los Angeles might seem simple, but city regulations, traffic, and cost-of-living pressures mean a short-distance move can quickly become complicated—and expensive. If you want to move a few miles across LA without breaking the bank, this guide will walk you through every affordable option, cost breakdown, and proven insider tip to make your local move as smooth and cheap as possible.

    Cheapest way to move short-distance in LA

    Know Your Options: What’s the Cheapest Way to Move in LA?

    Short-distance moves in LA can be handled in several ways, each with a different price tag, effort level, and suitability.

    Move typeAverage costCrewNotes
    Studio/Sm. Apt$300 – $6002 movers3-4 hours, includes truck
    1-bedroom Apt$400 – $7502 movers3-5 hours
    2-bedroom Apt$750 – $1,9003 movers4-8 hours
    3-bedroom House$1,200 – $3,500+4 movers6-12 hours, stairs extra

    DIY with your own vehicle can cost only gas and supplies, while hybrid (truck/labor) splits the difference. Always clarify quotes and hidden fees before hiring.

    • DIY Truck Rental: Companies like Budget and U-Haul offer vans and trucks starting as low as $19.99 a day plus mileage (around $0.69 per mile). Bring friends for labor, and this is usually the lowest out-of-pocket option for small loads or students. Factor in gas, insurance, and your own effort and time.
    • Hybrid Move: Combine your own labor with hired help. For example, rent a truck yourself and hire moving laborers to load and unload. This gives you pro muscle where needed, but you save by doing the packing and driving work.
    • Moving Containers: Services like PODS allow you to pack at your pace, with containers delivered and relocated for you. This is great for multi-day flexibility or awkward transitions between leases, though generally pricier than pure DIY for single-day moves.
    • Professional Movers: For those who want a hands-off move, full-service short-distance movers in Los Angeles charge by the hour. Expect to pay $100–$170 per hour for a two-person crew, with a minimum of 2–3 hours (meaning moves usually start at $300–$350). This rate usually includes the truck, equipment, and basic insurance.

    Cost Breakdown for Moving Locally in Los Angeles

    Here’s what you can expect to pay for short-distance moves (2025 estimates):

    • DIY truck rental only (no labor): As low as $100–$200 plus gas, if you can carry the load and return the truck same-day.
    • Hybrid (truck + hired labor): $40–$75 per hour per laborer, plus truck fees.
    • Professional LA movers: $100–$170 per hour with a 2–3 hour minimum, often including insurance and equipment.
    • Always request a detailed quote and check for hidden fees like “long carry,” stairs, or supplies.

    Top Ways to Save on Your LA Move

    • Declutter and Downsize: Before the move, donate, sell, or recycle items you don’t need. Less stuff means a smaller truck, fewer labor hours, and a faster, cheaper move.
    • Self-Pack: Gather boxes from grocery or liquor stores for free, and wrap fragile items yourself. Only pay movers for their time carrying—not packing—your goods.
    • Move on Off-Peak Days: Weekdays, mid-month, and non-summer dates are less busy and often come with discounts; avoid weekends and end/beginning of the month.
    • Get Multiple Quotes: Contact at least 3–5 moving companies, compare their reviews, and negotiate. Ask about available discounts (student, senior, AAA, etc.).
    • Prep Ahead: Disassemble furniture, unplug appliances, and clear a path before movers arrive. This avoids overtime charges and makes the job faster.

    Insider Tips for Moving in Los Angeles

    • Understand Parking & Permits: In dense LA neighborhoods, parking a moving truck can be a nightmare. Reserve parking or get a temporary permit from the city or your building management to avoid tickets and wasted time.
    • Account for Building Restrictions: Many apartment complexes require insurance or have strict move-in/move-out times. Reserve elevators and check with your HOA, especially in places like Downtown, Westwood, or Koreatown.
    • Time Your Move Carefully: Avoid rush hours, citywide events, or heatwaves—early morning is typically best in LA. Planning around LA traffic will save you money and frustration.
    • Hire Movers Familiar With LA: Opt for companies experienced with LA-specific challenges, like narrow streets, old buildings, and odd parking regulations.

    Avoid Hidden Fees and Moving Mistakes

    • Clarify What’s Included: Ask for a detailed, written quote. Watch for extra charges for stairs, elevator waits, long carry distances, or supplies.
    • Review Insurance Coverage: Standard moving insurance is basic; high-value items may need extra protection. Check your renter’s or homeowner’s policy first, and request proof of insurance from movers.
    • Read the Fine Print: Beware of low-ball quotes or movers demanding cash deposits. Check for a valid California license (CAL-T/CPUC) and positive reviews on Google or Yelp.

    When Professional Local Movers Are Worth It

    While pure DIY can be the cheapest upfront, combining your labor with pro movers can save your back—and sometimes your wallet—when you account for efficiency, minimized risk, and the value of your own time. Look for insured, licensed teams who know LA’s neighborhoods and will give you a transparent, all-in price with no hidden fees.

    Moving locally in Los Angeles doesn’t have to mean spending a fortune or handling every box by yourself. By choosing the right mix of moving methods, decluttering, negotiating with trustworthy short-distance movers, and planning for LA’s unique logistics, you’ll save money while enjoying a smooth, stress-free transition to your new home.

    Ready to move? Contact our short-distance moving specialists for a free, honest quote and let LA’s local experts do the heavy lifting—so you can enjoy everything your new neighborhood has to offer.

  • What Is White Glove Moving Service?

    What Is White Glove Moving Service?

    Moving isn’t just about transporting boxes—it’s about protecting the things that matter most. For clients who expect premium care, white-glove moving service is the gold standard. Affordable Moving LLC provides this luxury moving experience across Los Angeles and beyond, ensuring every detail of your relocation is handled with precision, professionalism, and discretion.

    What Is White Glove Moving Service?

    Who Is White-Glove Moving For?

    White-glove moving is designed for customers who need more than standard moving assistance. It’s ideal for:

    • Executives and professionals who value efficiency and time.
    • Collectors and art owners moving fragile, high-value items such as paintings, antiques, or sculptures.
    • Homeowners with luxury furniture or designer interiors that require careful handling.
    • Busy families who want a stress-free, end-to-end moving solution without lifting a finger.

    Key Features of White-Glove Moving

    Unlike traditional moving, white-glove service emphasizes personalized care and protection. Here’s what sets it apart:

    • Premium Packing & Materials. Every item is packed with specialized supplies—custom crates, climate-safe wraps, and reinforced boxes—to protect valuables during transit.
    • Specialty Handling. Our LA movers are trained to disassemble, transport, and reassemble pianos, chandeliers, glass furniture, and electronics with meticulous attention to detail.
    • Climate-Controlled Transport & Storage. For sensitive items like artwork or wine collections, we offer climate-stable storage and transport solutions.
    • Full-Service Setup. White-glove doesn’t stop at delivery. We’ll unpack, arrange furniture, hang artwork, and remove debris, leaving your new space move-in ready.
    • Discreet & Professional Team. Our crews are vetted, uniformed, and trained to provide respectful, quiet, and efficient service—perfect for high-profile clients.

    Average Cost of White-Glove Moving Service

    Because white-glove moving is a premium service, the price is higher than standard relocation. Costs vary based on home size, distance, inventory complexity, and specialty handling needs.

    National Benchmarks

    • Industry resources show that white-glove relocations can range from $6,000 up to $100,000+, especially for long-distance or luxury moves that require storage, fine art handling, or full setup.
    • Compared to traditional moving (which averages $850–$2,300), white-glove is typically 2–4 times more expensive, but with unmatched service quality.

    Los Angeles-Specific Estimates

    In Los Angeles, where standard local moves average $100–$150 per hour, clients can expect white-glove pricing such as:

    • Studio / 1-bedroom: ~$1,200 – $2,400
    • 2–3 bedrooms (local): ~$2,000 – $6,000+
    • Large homes / luxury estates: $10,000+
    • Cross-country moves: $6,000 – $100,000+ depending on distance and complexity
    Move Type / SizeStandard EstimateWhite-Glove Estimate
    Studio / 1-bedroom$400 – $900$1,200 – $2,400
    2–3 Bedrooms (local)$750 – $1,900$2,000 – $6,000+
    Large Home / Luxury Residence$2,100 – $5,100+$10,000+
    Long-Distance / Cross-Country$3,000 – $5,000+$6,000 – $100,000+

    (Figures are averages; your exact cost depends on inventory, access, schedule, and service level.)

    Why Customers Choose It Anyway

    While the price is higher, white-glove service delivers peace of mind, convenience, and luxury-level execution. Customers don’t just pay for a move—they invest in a seamless transition handled from start to finish.

    Why Los Angeles Customers Choose Affordable Moving LLC

    With over a decade of experience and 6,200+ moves completed each year, Affordable Moving LLC has earned a reputation as one of LA’s most trusted movers. Whether you’re relocating from a penthouse in Downtown Los Angeles, a beachfront home in Malibu, or a corporate office in Santa Monica, our white-glove specialists ensure a seamless, stress-free transition.

    We are fully licensed and insured (US DOT No. 2879660, ICC MC No. 13349), and we offer flexible scheduling—including evenings and weekends—to meet the needs of busy clients.

    Elevate Your Moving Experience

    Contact us today to book your white-glove moving service in Los Angeles and experience moving at its finest.

  • How to Move a Pool Table: Expert Tips from Los Angeles Movers

    How to Move a Pool Table: Expert Tips from Los Angeles Movers

    Pool tables aren’t just heavy—they’re delicate, precise, and expensive to repair if mishandled. Whether you’re relocating within Los Angeles or moving cross-country, understanding how to move a pool table safely is crucial. Affordable Moving LLC specializes in pool table moving services in LA, ensuring your prized game room centerpiece arrives in perfect condition.

    Pool table relocation

    Why Moving a Pool Table Is Different

    Unlike regular furniture, a pool table can weigh 600 to 1,000 pounds and consists of multiple fragile components:

    • Slate bed (the heavy stone surface)
    • Cushions and rails
    • Felt covering
    • Legs and frame

    Each part requires careful disassembly, packing, and reassembly to maintain the table’s balance and playability. One wrong move can damage the slate or ruin the felt.

    DIY vs. Professional Pool Table Movers

    While some homeowners consider a DIY move, the risks are high:

    • Risk of injury: Pool tables are too heavy for untrained movers.
    • Damage potential: Dropping slate can crack it beyond repair.
    • Re-leveling issues: Even if you move it, getting it leveled again requires professional tools.

    Step-by-Step: How Professionals Move a Pool Table

    Step-by-step pool table moving process

    Moving a pool table is a complex process that goes far beyond simply lifting and loading.

    1. Pre-Move Assessment & Planning

    Before touching the table, our movers evaluate the layout of your home, including doorways, staircases, tight hallways, and potential obstacles. We take measurements and plan the safest route. This prevents costly mistakes like chipped walls, scratched floors, or damaged slate.

    2. Careful Disassembly

    A pool table can weigh up to 1,000 pounds, so breaking it down into parts is essential:

    • Pockets – Leather or plastic pockets are detached carefully to avoid tearing.
    • Rails & Cushions – Side rails are unscrewed and labeled for easy reassembly.
    • Felt – Depending on condition, the felt is either carefully removed and stored, or replaced with fresh cloth at the customer’s request.
    • Slate Bed – The heaviest part, typically 3 separate slabs of slate (150–250 lbs each), is detached with precision tools. Movers lift with specialized equipment to prevent cracks or warping.
    • Legs & Frame – The supporting frame and legs are unscrewed and wrapped for protection.

    3. Protective Packing

    Every component is individually wrapped in padded moving blankets, shrink wrap, or crates:

    • Slate pieces are cushioned and secured flat to prevent shifting during transport.
    • Felt is rolled or folded to avoid wrinkles.
    • Wooden frames are padded to prevent scratches.

    This stage is crucial to ensure the table arrives in the same condition it left.

    4. Safe Transportation

    Our trucks are equipped with lift gates, dollies, and tie-down systems designed for oversized and fragile items. Slate slabs and frame pieces are secured upright or flat, depending on weight distribution. We use air-ride suspension trucks to minimize vibrations that could affect delicate slate leveling.

    5. Reassembly at the New Location

    Once delivered, we carefully reverse the disassembly process:

    • Frame & Legs – Assembled and stabilized.
    • Slate Installation – Slabs are placed, aligned, and secured with screws and beeswax or seam filler to create a seamless playing surface.
    • Leveling – Using precision tools, we adjust each slate section until the surface is perfectly even. This step ensures your table plays like new.
    • Felt Application – The felt is re-stretched tightly across the slate for a smooth finish.
    • Rails & Pockets – Rails and cushions are reattached, and pockets secured in place.

    6. Final Calibration & Inspection

    After reassembly, our movers perform a play-test check to confirm the table is completely level and ready for use. We also clean the surface, polish the frame, and ensure the table looks as good as it plays.

    How Much Does It Cost to Move a Pool Table in Los Angeles?

    Costs depend on the size of the table, access challenges, and whether re-felting is requested:

    • Local pool table moves in LA: $400 – $800 on average
    • Moves with stairs or long-distance relocations: $600 – $1,200+
    • Re-felting or upgrades: Additional $200 – $500 depending on materials

    Affordable Moving LLC provides transparent, upfront pricing with no hidden fees, so you know exactly what to expect.

    Why Choose Affordable Moving LLC for Pool Table Moving in LA?

    • Specialized training: Our crews are experienced in heavy and delicate items like pool tables, pianos, and gym equipment.
    • Full insurance coverage: Giving you peace of mind for high-value items.
    • Modern equipment: Heavy-duty dollies, lifts, and protective gear for safe handling.
    • Local expertise: Serving Los Angeles neighborhoods from Hollywood Hills and Sherman Oaks to Pasadena, Santa Monica, and Beverly Hills.

    Don’t Risk Your Pool Table—Hire Experts

    Moving a pool table isn’t just about muscle—it’s about precision. Whether you’re upgrading your game room in LA or relocating across California, Affordable Moving LLC offers the safe, professional pool table moving service you need.

  • Why Hire a Specialist for Piano Moving? Risks of Using Standard Movers in Los Angeles

    Why Hire a Specialist for Piano Moving? Risks of Using Standard Movers in Los Angeles

    Moving a piano is no ordinary task. These complex musical instruments, often weighing hundreds or even thousands of pounds, consist of thousands of calibrated parts that make them not only valuable but highly delicate. In Los Angeles, where the challenges of narrow stairways, heavy traffic, tight doorways, and multi-story buildings abound, moving a piano safely demands expert knowledge and specialized equipment.

    Hiring a specialist piano moving company isn’t merely a luxury—it’s crucial to keep your instrument intact, protect your property, and avoid costly damages and injuries. This article explains why relying on standard movers for your piano could be risky, and why experts matter.

    Why Hire a Specialist for Piano Moving?

    The Unique Challenges of Moving a Piano

    Pianos vary in shape and size—from compact uprights to stunning concert grands weighing over a ton. Regardless of type, their awkward weight distribution, size, and fragile internal mechanisms make handling tricky.

    Pianos consist of thousands of delicate parts including strings, hammers, soundboards, and finely tuned keys. Dropping or jarring the instrument just slightly can cause irreparable damage affecting sound quality and functionality.

    Moving a grand piano often requires partial disassembly, including the removal of legs and pedals. Uprights still pose a hefty challenge due to their weight and fragility. Without the right technique and tools, a piano can easily be scratched, dented, or knocked out of tune.

    Risks of Using Standard Movers for Pianos

    Most general moving companies lack the tools, experience, and training to relocate pianos properly. Common pitfalls include:

    • Inadequate Equipment: Standard movers often don’t have piano dollies, skid boards, padded blankets, or custom straps needed for safe transport.
    • Improper Handling: Navigating narrow doorways, staircases, and hallways without expert technique leads to damage to both piano and property.
    • Injury Risk: Moving heavy, unbalanced pianos without specialized training can cause severe back, muscle, or crush injuries.
    • Insurance Gaps: Many standard movers don’t include piano-specific insurance coverage. Damage may not be covered, leaving you financially liable.

    These risks can result in costly repairs, lost sentimental value, or worse—a completely ruined piano.

    How Specialist Piano Movers Protect Your Instrument

    Professional piano movers bring more than muscle—they bring expertise and equipment designed specifically for piano moves:

    • Tools & Materials: They use multi-person dollies reinforced with steel, thick padded blankets, strong ratchet straps, and wooden skid boards to cradle the instrument securely.
    • Disassembly & Assembly: Grand pianos are carefully disassembled and reassembled by skilled movers to prevent damage during transit.
    • Local Knowledge: Expert movers know the complexities of Los Angeles’ urban layout—elevator access, parking permits, traffic patterns, and tight building corners.
    • Safety Protocols: Movers are trained to protect themselves and your property, reducing the chance of injury and property damage.

    Cost vs. Value: Why Specialist Services Make Financial Sense

    Though hiring a specialist piano mover might seem more expensive upfront, the alternative risks are staggering. Damage repairs can run into thousands, and you may lose the instrument’s original tone, aesthetic value, or historic significance.

    A piano often carries emotional value beyond dollars. Investing in expert movers ensures peace of mind, saving you stress and money in the long run. Additionally, professional movers carry comprehensive insurance and liability coverage tailored for pianos.

    Why Los Angeles’ Environment Demands Expert Piano Movers

    LA’s dense urban environment presents particular challenges:

    • Parking and Permitting: Loading zones require permits, and street parking is limited. Professionals prearrange these so movers can work without delay.
    • Traffic & Timing: Navigating LA’s notorious traffic is a skill in itself—specialists plan routes and times efficiently to avoid hold-ups.
    • Building Restrictions: Many LA condos and apartments have strict move-in/out windows and elevator reservation rules which specialists manage deftly.
    • Stairways & Loading Docks: Some homes have narrow, winding staircases or small elevator doors only experienced piano movers can handle safely.

    Invest in a Specialist for a Safe, Stress-Free Move

    Your piano deserves the utmost care and expertise. Avoid the risks of damage, injury, and costly repairs by entrusting your piano move to specialist movers experienced in handling these delicate instruments—especially in a challenging city like Los Angeles. With the right team, your piano can be safely relocated and ready to fill your new home with beautiful music.

  • What Is the Cheapest Way to Move Long Distance?

    What Is the Cheapest Way to Move Long Distance?

    Long-distance moves are a big undertaking, and they often come with a big price tag. The average cost of hiring professional movers for an interstate move is around $4,890 (for ~7,500 pounds of goods over 1,000 miles). Why so expensive? A lot of factors influence the cost of moving cross-country. Distance is a major factor – more miles mean more fuel and time. Weight and volume of your belongings also drive cost; moving companies typically charge by shipment weight or space. The time of year matters too (summer peak season rates are higher due to demand). Additional services like packing, special handling for bulky items (pianos, safes), insurance coverage, and even home layout (e.g. stairs or difficult access) can add to the expense. With so many cost factors, it’s no wonder moving long-distance can strain your budget. The good news is that there are several options to choose from – each with different cost trade-offs – to help you find the cheapest way to move cross-country for your situation.

    Comparing the Cheapest DIY Moving Options

    When budget is the top concern, many people consider “do-it-yourself” (DIY) moving methods. The main DIY long-distance moving options include renting a truck, using portable storage containers, shipping via freight trailers, or even mailing some items. Below we compare these major options in terms of cost and service factors.

    1. Truck Rentals

    Renting a moving truck for a long-distance move is often the first idea for a budget-conscious mover. On paper, truck rentals have the lowest base price of any full-house moving option. However, it’s important to account for all the extra costs you’ll incur when driving a moving truck across the country.

    • Rental rates: Truck rental prices depend on the truck size, distance, and rental duration. For a ~1,000+ mile one-way move, you might pay roughly $800–$1,900 for a small 10-ft truck (suitable for a 1-bedroom load) and around $1,800–$3,100 for a large 26-ft truck (fits a 4–5 bedroom home) as the base rate. For example, one analysis found a cross-country move cost about $2,661 for a 10-foot truck vs. $4,481 for a 26-foot truck – larger trucks cost more to rent. Keep in mind these base quotes usually do not include fuel or other fees.
    • Fuel costs: A DIY truck move means you’ll pay for gasoline or diesel out-of-pocket. Larger rental trucks get poor mileage – around 8–10 miles per gallon is common. For a 1,000-mile trip, a fully loaded truck could require ~100–125 gallons of fuel. If gas is $3–$4 per gallon, that’s an extra $300–$500 (or more if prices spike). Fuel can easily become one of the biggest expenses in a DIY move.
    • Lodging and travel: Unless you’re moving a relatively short distance, you’ll likely need to drive for multiple days, which means budgeting for food and lodging on the road. A cross-country trip (say 2,000+ miles) might take 3–4 days of driving, adding hotel costs of a few hundred dollars. Even a 1,000-mile move usually means at least one overnight stay (~$100+ per night depending on location). Don’t forget road tolls and any unexpected travel expenses as well.
    • Insurance: Truck rental companies offer optional insurance coverage for the vehicle, which is highly recommended for long trips. Purchasing supplemental liability coverage and damage waivers can add roughly $100 or more to your bill (varies by company and truck size). This covers the rental truck itself – note that it does not insure your cargo inside. You may need separate transit insurance for your belongings or risk being unprotected if something gets damaged.
    • Labor and effort: With a rental truck, you’re signing up to do all the work (or find help). That means packing all boxes, lifting and loading furniture into the truck, driving the heavy vehicle long-distance, and then unloading at your destination. If you have large furniture or limited help, you might hire moving labor for loading or unloading, which typically costs extra (for example, two helpers might charge ~$200–$400 for a few hours of loading). Even if you round up friends or family to assist, a DIY move will cost you in sweat equity and stress. Be realistic about the physical effort required, especially for big household moves.

    Is a rental truck the cheapest? For many people on a tight budget, renting a truck is the cheapest way to move long-distance in terms of pure dollar cost. A DIY truck move for a small load can cost as little as around $1,200 (not including personal labor) on the low end. But for larger homes, the expenses begin to add up. By the time you add fuel, lodging, insurance and equipment, a long-haul truck rental may run a few thousand dollars in total. It’s still often cheaper than full-service movers, but the gap narrows for bigger moves. Also consider non-monetary costs: driving a 26-foot truck through multiple states, potentially in bad weather or heavy traffic, can be challenging if you’re not used to it. In short, truck rental is the classic cheap option – just go in with eyes open about the extra costs and effort involved.

    2. Portable Storage Containers

    Portable moving containers have become a popular hybrid approach that balances cost and convenience. With this method, a company delivers a weatherproof storage container to your driveway; you load it with your belongings at your own pace, and the company then picks it up and transports it to your new home (or to storage).

    • Costs and examples: The price of portable containers is generally higher than a DIY truck, but often cheaper than full-service movers. For a long-distance move, moving container prices can range widely based on home size and distance. For instance, moving one small container for a 1-bedroom apartment cross-country might cost around $1,200–$4,000, whereas using multiple large containers for a 4–5 bedroom home could run $3,500–$7,600. Move.org reports the average cost for a 1,000-mile container move is ~$4,430, with about $3,170 for a 1-bedroom and $6,620 for a 5-bedroom home. These quotes typically include the container drop-off, transportation, and a certain amount of time for loading and unloading (often a month of use).
    • Included storage time: One advantage of containers is that storage is built into the price. Most container companies include at least 30 days of container use in your quote. This means you can pack your container over a couple of weeks, and even have it sit at your destination for some time until you move in. If you need longer-term storage (for example, your new home isn’t ready yet), you can usually pay monthly to keep the container in a storage center. This flexibility can save you the cost of a separate storage unit during a complicated move.
    • No driving for you: With portable containers, you don’t have to drive a truck. The company handles all the transportation logistics, which saves you fuel and travel costs. In fact, using a moving container often costs less than renting a truck when you factor in gas, food, and hotels. This makes containers a great option if you’re not comfortable driving a big rig or if you want to save time on a cross-country road trip.
    • Labor considerations: Containers are a DIY pack and unpack model. You’ll be doing the heavy lifting to fill the unit (or you can hire local movers to help load it). Once loaded, however, you get to relax while someone else does the long-distance driving. At delivery, you unload your items from the container yourself. It’s less labor than a full DIY truck (since you avoid driving), but you still need to pack and secure everything properly in the box. Pro tip: consider hiring moving helpers for a few hours if needed – even with that cost, a container move can be cheaper than full-service and much easier on you physically.
    • When containers make sense: Portable containers shine in a few scenarios. They’re ideal if you need flexibility with your move timing – e.g. you want to load slowly over several days, or you have a gap between move-out and move-in and need storage. They’re also great if you’re driving your own car to the new location (or flying) and can’t tow everything. In terms of cost, containers are often cheapest for mid-sized moves (2–3 bedroom homes) where a DIY truck might be cumbersome but a full-service mover is too pricey. Just note that if you have a very large home, you might need multiple containers, which can get expensive – requiring two or three containers can drive up costs to comparable or higher than hiring movers. Always get quotes for both options if your move is big.

    3. Freight Trailers or Pallet Shipping

    Another budget-friendly long-distance moving method is to use a freight trailer service or freight shipping for your household goods. Companies offer a trailer drop-off: they park a 28-foot freight trailer at your home, you load a portion of it with your stuff (securely partitioned), and you only pay for the linear feet of trailer space you use. Alternatively, you can palletize boxes or furniture and ship them via LTL (less-than-truckload) freight carriers or freight brokers. This option is somewhat between using a container and hiring movers.

    • Pricing structure: Freight trailer services charge by volume (or linear feet). For example, U-Pack might quote around $125 per linear foot of trailer space on a cross-country move. If you only need 5 feet of trailer, you pay for 5 feet; if you end up using 15 feet, you pay more. This can be very cost-effective for small to medium loads. As a rough guide, using about 17 feet of a trailer (which might fit a 2-3 bedroom home) could cost on the order of $4,000+ for a long-distance move, whereas a tiny studio apartment using 5-6 feet might cost under $1,500. Average cross-country freight trailer moves tend to be in the mid-$2,000s for typical loads – for instance, Moving.com lists $2,500–$3,000 as a ballpark for a freight trailer move across the country.
    • How it works: If using a full trailer service like U-Pack, the company will drop off a large trailer at your curb or driveway. You usually get 1–2 days to load your belongings into one section of the trailer. You’ll need to secure your load (tie-downs, etc.), then the driver picks up the trailer and heads to your new city. If you used, say, 10 feet of the trailer, they fill the rest with other customers’ shipments (or leave it empty if not needed). Your stuff is partitioned and stays separate. Alternatively, if you go through a freight broker, you might pack your items onto standard pallets and have a freight truck pick them up. This requires carefully wrapping and securing everything to withstand transport. It’s often used for small moves (just a few pallets of boxes and furniture).
    • Pros: The main advantage here is cost savings for smaller moves. If you don’t have a full household of furniture, you’re not stuck paying for a whole truck – you pay only for the space you use. It also removes the need for you to drive a vehicle. Transit times can be reasonably fast (often faster than pods) because freight trucks are on the road constantly and you might get a more direct route. U-Pack, for example, often delivers in 3-7 business days for cross-country moves. Additionally, like containers, fuel is included in the price you pay – you’re not paying separately for gas or tolls, which simplifies budgeting.
    • Cons: On the downside, you still have to do all the loading and packing or hire help. There is also an element of coordination and timing needed – you must be ready to load when the trailer arrives and available to unload when it shows up at destination (though you can request short-term storage at a terminal for a fee if needed). Another consideration is that your items will be on a truck with other shipments (if using a service like U-Pack trailer or LTL freight). While they are kept separate, there’s a bit more handling involved (especially with pallet shipping, where boxes might be moved in and out of trucks). You’ll want to ensure you have adequate insurance or declared value coverage for a freight shipment, since standard carrier liability might be quite limited (often around 10 cents per pound by default, which wouldn’t cover most valuables).
    • When it’s cost-effective: Freight-based moving is best suited for small to mid-size moves where you have more stuff than would fit in a mail shipment, but maybe not an entire 26-foot truck worth. Examples: a studio or 1-bedroom apartment, a student moving out-of-state, or even a small 2-bedroom home if you’re efficient. If you have only a room or two of belongings, getting a freight quote can often beat container prices. However, if you have a very large home (4+ bedrooms), you’d likely need the entire trailer – at that point, the cost may be comparable to other methods, and you might lean toward full-service movers for convenience. Always compare.

    4. Shipping Items for Minimal Loads

    What if you hardly have anything to move? Perhaps you’re young, moving long-distance to take a job, and all you have are clothes, personal items, and maybe a small TV – no furniture. In such cases, the absolutely cheapest way to move long-distance might be to ship your belongings via parcel services or USPS rather than renting any kind of moving vehicle at all.

    • When this works: Shipping boxes is cost-effective only if you have a very small volume of stuff. Think on the order of dozens of boxes, not rooms of furniture. You can pack your items into shipping boxes and take them to UPS, FedEx, or USPS and send them to your new address. You might also ship some items and take a few as checked luggage on a flight, for example. This method is great for a “minimalist move” or one where you’re not taking furniture. It’s also an option to ship a portion of your things (like books or off-season clothes) to reduce the load you put in a car or moving truck.
    • Cost example: For small moves, shipping can be dramatically cheaper. One comparison found that sending 10 medium boxes via FedEx or USPS ground service would cost roughly $245–$250 total, whereas renting even a small moving truck for a long distance could cost around $2,900 (nearly ten times more). This illustrates that if your goods fit in a handful of boxes, parcel shipping is a clear winner for cost. You’ll typically pay based on weight, distance, and speed of delivery. Slower shipping options (ground, media mail for books, etc.) are more affordable.
    • Pros: The advantages are clear: you avoid driving entirely, and you don’t have to deal with large equipment or fuel costs. You can drop off boxes at the post office or schedule a pickup, which is convenient. Delivery can be fairly quick (a few days to a couple of weeks depending on service). Plus, if you’re only sending personal items, you might not need to rent a truck at all – you can just fly or drive your personal vehicle to your new home and find your shipped boxes waiting.
    • Cons: There are some limitations. Package services have size and weight limits per box (generally 70–150 lbs max per box, and dimensional limits). Large furniture or very bulky items are not feasible to ship via FedEx/UPS in normal fashion – those would require freight shipping which we covered above. You also have to pack everything extremely well for parcel transit, as boxes may be handled roughly. While you can buy insurance on shipments, carriers typically have limited liability for lost/damaged packages. And of course, shipping dozens of boxes can become tedious and the costs will add up if you exceed a small quantity. In many cases, if you have more than perhaps 15–20 boxes, you may find a small moving container or trailer service to be more practical and potentially cheaper.
    • Tip: People often use a hybrid approach for small moves: for example, ship heavy books via USPS Media Mail (ultra cheap for books), send a few boxes of clothes and personal items via UPS, and carry the rest in a car or luggage. By strategizing item by item, you can minimize costs. If you have any large single items (like a piece of furniture) and you’re trying to avoid full-service movers, look into specialty shipping or marketplace options — there are apps where you can find drivers to haul a piece of furniture cheaply, or freight options for one-off items. But for truly minimal moves, the mail carriers can be your cheapest solution.

    Cost of Hiring Professional Movers

    Full-service professional movers handle every aspect of the move for you – from loading your furniture, transporting it, to unloading at your new home (and often they can pack and unpack boxes if you pay for that service). This is by far the most convenient option, but it’s also perceived as the most expensive. However, depending on the size of your move and the value of your time/effort, hiring movers might be worth it or even cost-effective in some situations (we’ll explore that soon). First, let’s look at what long-distance moving companies typically charge.

    Average price ranges by home size: Unlike DIY options, pro mover pricing is usually based on the distance and the weight (or cubic feet) of your shipment, plus any additional services. The bigger your home, the heavier (and more space) your stuff takes, so cost goes up. For example moving a one-bedroom apartment 1,000+ miles costs around $2,200–$3,500 on average. A 2–3 bedroom home (roughly 7,500 lbs of goods) might cost about $6,300 (or in a range of $6,700–$9,250 depending on exact distance and services). And a large 4–5 bedroom house could run anywhere from around $12,000 up to $17,000 or more for a cross-country move. In general, most cross-country full-service moves land in the $4,000–$9,000 range for typical households. (Very small long-distance moves can be less, and very large or coast-to-coast moves can be more.) These figures may make DIY options look tempting, but remember these are door-to-door professional services with almost everything included. Try to use our online long-distance moving cost calculator.

    What’s included in the price: When you hire interstate movers, the quote usually includes trained moving labor, the moving truck and fuel, basic liability insurance coverage, and equipment/supplies for protecting your furniture (like moving blankets, straps, dollies). Essentially, you are paying for a turnkey service: a team will come and do the heavy lifting, load the truck, drive to your new home (often with a dedicated truck for your stuff alone if it’s a big move), and place your items in your new place. If you opt for full packing services, they will also pack your boxes (for an added cost). The base quote generally assumes you’ll be moved out and moved in on specific agreed dates, and it includes the transportation and labor for loading/unloading. Unlike a rental truck, where a lot of incidental costs pile on top, a mover’s quote is more all-inclusive (aside from potential add-ons discussed next). Insurance coverage is one important inclusion: reputable movers provide basic valuation coverage for your items by default (often $0.60 per pound per item liability). You can usually upgrade to Full Value Protection for an extra fee if you want full replacement/repair coverage for any damaged items. Having this safety net is a benefit of using pros – if something breaks in transit, you’re entitled to reimbursement (at least at a basic level).

    Extra fees to watch for: When getting quotes from movers, ask about potential additional fees so you’re not caught off guard. Some common add-on charges include:

    • Packing services: If you want the movers to pack boxes for you, that will cost extra for labor and materials. You can save by packing yourself.
    • Bulky or special items: Extremely heavy or delicate items (pianos, pool tables, safes, large appliances) often incur an extra handling fee due to the difficulty and equipment needed.
    • Long carry or shuttle: If the moving truck can’t park close to your home’s entrance and movers have to carry items a long distance (often >75 feet) or use a smaller shuttle truck, there can be fees. Similarly, flights of stairs or no elevator in an apartment might add a stair carry charge.
    • Storage or delays: If you need the mover to hold your items for a period (storage in transit) or if you cause a delay (e.g. last-minute change in move date), there could be storage fees or date change fees.
    • Insurance upgrades: Basic coverage is included, but if you choose full replacement value insurance, that premium will be added (usually calculated as a percentage of your goods’ value).
    • Tipping: While not a fee from the company, remember to budget for a gratuity to the crew if their service is good (often recommended at $4-5+ per hour per mover, or a lump sum like $20-40 per mover for a long job). This is optional but customary for their hard work.

    Always request a written, comprehensive quote and ask the company to spell out any charges for special circumstances. A reputable mover will do a detailed inventory (in-home or virtual survey) to give an accurate estimate. Beware of quotes that seem too low – the moving industry, unfortunately, has some scammers who bait with a low price then hit you with huge “additional” charges later. It’s wise to get a few quotes and ensure each covers the same services for a fair comparison.

    In summary, professional movers provide the easiest and most complete moving experience, but you pay a premium for it. The cost ranges can overlap with DIY methods for certain sizes of moves. In the next section, we’ll directly compare all these options side-by-side and discuss pros and cons.

    Pros and Cons of Long-Distance Moving Options

    It’s helpful to compare the trade-offs of each major moving method. Below is a side-by-side look at the cost factors, labor required, flexibility, speed, and insurance considerations for all options we discussed:

    OptionCostLabor/EffortFlexibilitySpeedInsurance Coverage
    DIY Truck RentalLowest base price (truck ~$1,000–$3,000 cross-country), but plus fuel, lodging, etc. You shoulder travel costs (fuel can add hundreds). Overall still cheapest for large loads if you don’t mind the extras.Very high effort – you pack, load, drive the truck, and unload all yourself (or with friends). It’s a full DIY affair, so be prepared for heavy lifting and long hours on the road.High scheduling flexibility – you set your own timetable for driving and can depart/arrive on your schedule. No waiting on a third-party’s delivery window (but must return truck by deadline to avoid late fees).Moderate to fast – you can drive straight through if motivated, but multi-day travel may slow it down. Generally faster than shipping containers since you go directly point-to-point.Limited coverage – rental contracts offer vehicle insurance (at extra cost) but no automatic coverage for your cargo. Your items are only insured if you purchase separate moving insurance. Risk of damage is on you.
    Portable ContainerModerate cost. Typically $2,000–$5,000 for long-distance moves (depends on home size). You pay a flat fee that includes drop-off, transport, and often 1 month storage. No fuel or lodging costs for you (included in price).Medium effort – you handle packing and loading/unloading the container. No driving needed. Less labor than full DIY truck (since you avoid the long drive) but still a lot of physical work to fill the container.Medium flexibility – you can usually keep the container for a few days or weeks to load at your pace. However, pickup and delivery dates must be scheduled. Transit timing is in the company’s hands (you might wait 1-2 weeks for delivery).Slower transit than a rental truck. Containers often travel on a truck or rail with other shipments, so cross-country delivery might take 7–14 days. Not ideal if you need your items immediately, but you can time delivery to match your arrival.Basic coverage included, but often limited (e.g. PODS includes some coverage by weight, often not much). You can usually purchase extra insurance for the container contents. You’re responsible for proper packing to protect items.
    Freight TrailerModerate cost. Around $2,500–$3,500 for a typical long move. You pay per foot of trailer used – efficient packing can save money. No separate fuel cost; it’s included. If you use only a small portion, it’s very cost-effective.Medium effort – similar to container: you load and secure your items (often on a trailer or pallets). No driving the truck. You may need to work within a shorter loading window (24-48 hours) compared to a container.Moderate flexibility – you schedule drop-off and pickup of the trailer. There’s less flexibility in keeping it for many days (trailers often need to stay on schedule). Good for those who can load quickly on specified days.Moderate speed – generally faster than containers because freight shipments move continually. Your trailer space might go direct on a truck route. Cross-country could be ~1 week give or take.Limited included coverage. Freight carriers have minimal liability by default (cents per pound). You should add insurance or declare value for better coverage. Since you load it, you’re also responsible if items weren’t secured well.
    Shipping BoxesVery low cost if volume is small. For example, ~10 boxes via USPS/UPS might be only $250–$300 total. As quantity increases, costs increase per box. Not feasible for whole households, but cheapest for a few boxes or totes of belongings.Low effort physically – you pack your boxes (which you’d have to do anyway), then drop off at shipping carrier or schedule a pickup. No furniture to lift, no driving. It’s a simple process, just lots of tape and labeling.High flexibility – you can ship items whenever you want. No complex scheduling; just send boxes to coincide with your move. If you stagger shipments, you can even send some things ahead of time.Fast (for small loads). You can choose fast shipping (2-3 days) or economy (1-2 weeks). Either way, your items will likely arrive quickly compared to other methods, since parcel networks are efficient.Comes with standard carrier coverage (often only $100 insurance included per package or less). You can buy additional insurance per box. However, if a box is lost or damaged, claims go through the carrier and may be limited. No comprehensive coverage like full-service moving offers.
    Professional MoversHighest cost option. Expect roughly $4,000–$9,000 for a long-distance move (home-size dependent). Large moves can exceed this. You’re paying for full service and convenience. Get binding quotes to avoid surprises and watch for add-ons in contract.Very low effort for you – the crew does all packing (if you opted for that), lifting, truck loading, driving, and unloading. You might literally not have to lift a finger on moving day. Easiest physically, and much less stress on you.Lower flexibility on timing – you work on the mover’s schedule. They’ll give a pickup date and a delivery window. Less control over exact delivery day (especially for cross-country, could be a range of a week or so unless you pay for dedicated or expedited service).Often the fastest overall for large shipments because you may get a dedicated truck. However, if combined shipments, delivery can take 1-2 weeks cross-country. If timing is critical, some movers offer guaranteed delivery for a premium.Good coverage included – by law, interstate movers provide basic liability (e.g. $0.60/lb per item). You can upgrade to full-value protection for true peace of mind. Your goods are covered for damage or loss under the mover’s policy, which is a big plus versus DIY where you bear the risk.

    (Table: A comparison of moving options by cost, effort, flexibility, speed, and insurance.)

    As you can see, each option has upsides and downsides. The cheapest purely in dollars is renting a truck or shipping a small number of boxes – but those come with the highest personal effort. Options in the middle (containers, freight trailers) save you some labor and still keep costs moderate. Full-service movers maximize convenience and protection at a premium price. Next, we’ll discuss how sometimes the “cheaper” DIY route isn’t always cheapest in the end, and when it might actually make sense to choose professionals.

    When Professional Movers Might Actually Be Cheaper

    Cheapest Way to Move Long Distance

    It’s easy to assume that doing it all yourself will always save money. In many cases it does, but there are scenarios where a DIY move ends up costing more than you expect – sometimes even rivaling a mover’s quote – once all factors are considered. Here are a few situations where hiring professional movers might actually be the more economical choice or the better value:

    • When you have a large home (4+ bedrooms): As mentioned earlier, big moves require big equipment. If your inventory can’t fit in one pod or one truck, the DIY costs multiply. For example, if you need multiple portable containers, the total cost can climb to be on par with (or higher than) a full-service mover. A quote for 2-3 large PODS containers plus the labor you’ll put in might come out to $5,000–$7,000. At that price, you could likely hire a mover to do it all for you and spare yourself the backache. Moving companies also often scale up efficiently – they can send a big 53-foot trailer or multiple trucks as needed in one trip, whereas DIY solutions might force you to break up the move (more trips, more containers, etc.). Always price out the mover option for large homes; you may be surprised that it’s not dramatically more than DIY once multiple trucks/containers are in play.
    • If you’re looking at long-distance container or freight costs that approach mover pricing: Some moving companies have become more competitive in pricing, especially for popular routes. There are even affordable long-distance movers with rates comparable to PODS or U-Pack. For instance, one mover advertised an average cost of ~$4,500 for a cross-country move from Seattle to NYC, which was almost identical to PODS’s price – but with full service and insurance included. If you can get a professional crew to do everything for nearly the same cost as a DIY container, it’s arguably a better deal to go with the pros (less work for you, and typically faster). The landscape is competitive, so do get a quote from a mover even if you think DIY is cheaper; you might find a deal.
    • When you’d have to rent extra equipment or services: DIY truck rental comes with some hidden costs that can tip the scales. Need a trailer to tow your car? That might be another $300–$500 added to the truck rental. Need to buy moving pads, hand trucks, or other gear? Those either cost extra to rent or to purchase. And if you decide to hire loading/unloading help on both ends, you might spend a few hundred dollars more. Once you tally truck + fuel + insurance + hotels + equipment + labor, the DIY route could inch closer to a mover’s price for medium-sized moves. In those cases, spending a bit more to let professionals handle it could be worth it.
    • Risk of damage and loss: Consider the worst-case costs. In a DIY scenario, if your belongings get damaged because of an accident or rough ride, you’re on the hook to replace them. Professional moves come with liability coverage, meaning if the movers break or lose something, you get compensation. While you hope nothing goes wrong, accidents can happen in a 1,500-mile move. A busted 4K TV or a shattered dining table could set you back hundreds or thousands to replace. Those potential costs (plus the value of your own time) are often not factored into a DIY budget. Some people ultimately find that the peace of mind with professionals ends up “cheaper” in terms of avoiding costly mishaps.
    • Opportunity cost and personal stress: “Cost” isn’t only in dollars. Think about time off work you might have to take to execute a cross-country drive, or the stress of driving a huge truck through mountain roads or snow. If taking an extra two vacation days (unpaid) to drive will cost you lost wages, that indirectly makes the DIY move more expensive. For families, a multi-day road trip with kids and pets in tow can rack up expenses (and headaches) quickly. In some cases, flying to your new home and letting movers handle the logistics could be financially wiser when you add everything up.
    • Special cases – long-term value: If you have particularly valuable items (antique furniture, fine art) that would require special crating or handling, a professional mover may actually prevent expensive damage that could occur in a DIY move. Also, if you’re moving to start a new job, arriving on time and not exhausted has its own value. These qualitative factors don’t show on a spreadsheet but matter in the big picture.

    In summary, the cheapest option on paper isn’t always cheapest once the dust settles. It’s worth evaluating your specific move details: volume, distance, help available, and personal circumstances. Many people find small moves are easy to DIY cheaply, but larger or more complicated moves can lead to unexpected costs where hiring pros provides better overall value.

    Finding Your Best Low-Cost Moving Option

    Moving long distance on the cheap is a balancing act between money, labor, and time. We’ve seen that the cheapest way in raw dollars is usually a DIY truck rental or even shipping a few boxes through the mail, especially for small moves. These methods can save you thousands compared to full-service movers, but they come with heavy trade-offs in terms of the labor you put in and some added risk. Portable moving containers and freight trailer services offer a middle ground – you’ll pay more than a rental truck, but you get transportation handled for you and potentially some built-in storage time, which can be well worth it. On the other hand, professional movers, while the most expensive upfront, provide end-to-end convenience, and in certain cases their quotes might not be as high above the DIY options as one might think (particularly for large, complex moves where DIY costs pile up).

    Ultimately, the “cheapest” way to move long-distance depends on your specific circumstances. If you’re young with a tiny apartment, the cheapest way might be selling most of your stuff and shipping the rest. If you’re a family moving a four-bedroom house, a combination of a rental truck and hired helpers might hit the sweet spot, or you may find a moving company that gives a reasonable deal when you factor in all the side costs. Always compare the total all-in costs of each option – include those hidden expenses like gas, lodging, and your own time. Also consider the value of professional expertise (avoiding damage, personal injury, or stress).

    By researching and getting quotes on all the methods we’ve compared – truck rental vs. container vs. freight vs. movers – you can make an informed decision. The cheapest option for you will be the one that fits your budget and your ability to safely execute the move. With the cost comparisons and tips we’ve outlined, you’re well equipped to plan a long-distance move that doesn’t break the bank.

    Get a Free Quote from Affordable Moving LLC

    Planning a long-distance move? Whether you decide on a DIY approach or want the ease of professionals, it’s wise to explore your options. As a licensed and insured moving company based in Los Angeles, Affordable Moving LLC is here to help. We specialize in cost-effective long-distance moves, offering customizable services that fit your budget and needs. Our team can provide as much or as little help as you want – from simply loading your rental truck to handling the entire move door-to-door. Before you make your final decision, why not see how affordable a stress-free move can be? Contact Affordable Moving LLC today for a free, no-obligation quote. We’ll give you an upfront estimate and answer any questions about moving long distance on a budget. Let us help you get to your next home safely, efficiently, and affordably. Safe travels and happy moving!